
Printer Issues and Troubleshooting
Source: X2D 3D Printing User Manual · v1.0 · 2026.05 · p. 127–135
10.1 Toolhead Clog Troubleshooting
If errors such as “extruder motor overload” or “air printing” occur during printing, or if the toolhead moves normally but no or little filament comes out of the nozzle, the main extruder inside the toolhead or the hotend is clogged. Follow the steps below to troubleshoot.
Initial Check: Unload Filament
- On the printer screen Homepage, tap Stop to end the print job.
- On the filament page, select the filament loaded in the main hotend and tap Unload.
Further Check: Manual Extrusion
- Remove the toolhead front cover, silicone sock, and hotend.
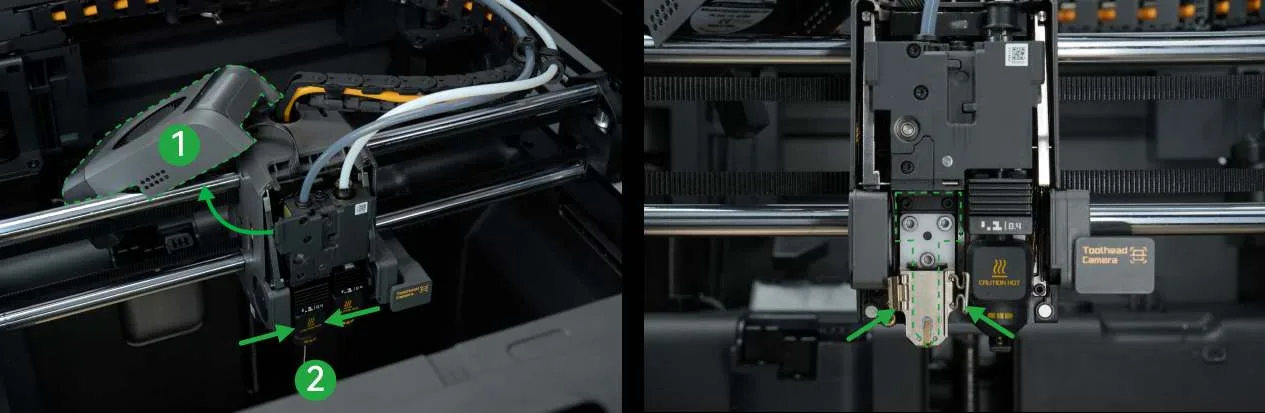
- Press the black outer ring of the toolhead filament inlet and pull out the PTFE tube.
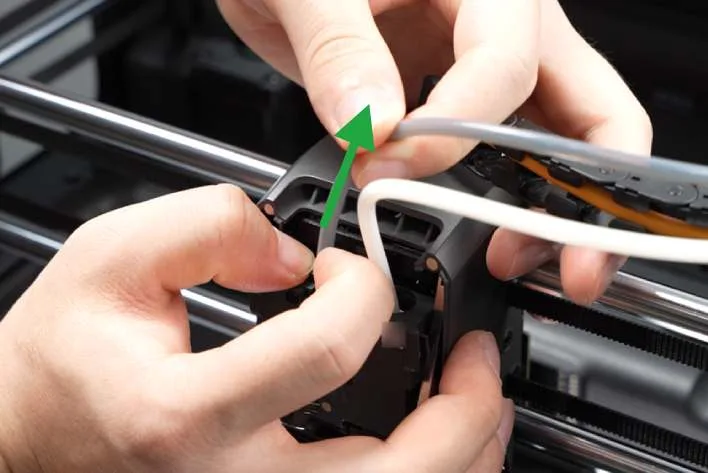
- Insert a piece of new filament into the toolhead filament inlet. On the printer screen, go to Nozzle & Extruder, tap Extrude, and observe the extrusion.
Unclogging Method
- Extruder cleaning is complex. Visit the Bambu Lab Wiki and search for “X2D main extruder clog” for detailed disassembly and cleaning instructions.
- See Hotend Unclogging for the next steps.
10.2 Hotend Unclogging
Hotend clogs typically occur in the hotend cold zone (①) or the nozzle (②). They may appear as clog error messages on the printer, or as clear under-extrusion in prints, such as gaps or layer separation.
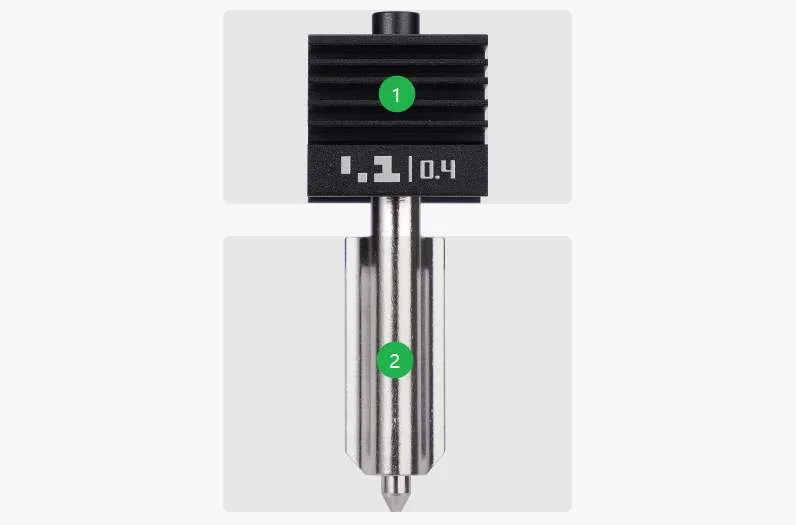
Before unclogging, identify where the clog is located:
| Clog Location | Possible Cause | Unclogging Method |
|---|---|---|
| Hotend (inlet and cold zone) | Filament diameter too large (> 1.8 mm) or inconsistent. | Unclog with Allen Key |
| Filament softening or swelling caused by heat creep, such as high chamber temperature or printing with low-temperature and high-temperature filaments together. | ||
| Nozzle | Nozzle temperature is set too low, causing the filament to melt slowly and accumulate in the nozzle. | Unclog by Manual Extrusion |
| Filament contains particles, such as carbon fiber or glow-in-the-dark filament, or impurities are stuck inside the nozzle. | Unclog with Unclogging Pin Unclog by Cold Pull | |
| High-temperature and low-temperature filaments are used together or in succession, causing the residual filament to remain unmelted and unable to extrude. |
- On the filament page, select the corresponding filament, then tap Unload. If an error appears, ignore it.
- Remove the hotend.
- Check if the filament at the hotend inlet is swollen or jammed.
- If the filament is stuck at the inlet, use an allen key to clear it. If the filament is not stuck, reinstall the hotend onto the toolhead, and follow the nozzle unclogging methods listed above.
10.2.1 Unclog by Manual Extrusion
Heat the nozzle to a higher temperature and extrude filament to clear the clog by increasing filament flow.
- On the printer screen, select Nozzle & Extruder, then choose the clogged nozzle.
- Set the nozzle temperature slightly above the average value, then tap Confirm to start heating.
- After the nozzle heats up, tap Extrude to extrude filament and check whether molten filament comes out of the nozzle.
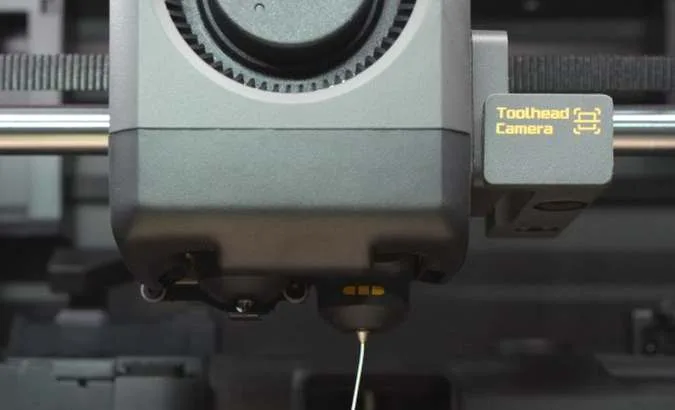
If the filament cannot be extruded normally, or if the extruded filament is too thin and brittle, see Unclog with an Unclogging Pin for the next step.
10.2.2 Unclog with Unclogging Pin
Heat the nozzle to a higher temperature, then use a fine-tipped unclogging pin to clear the nozzle from bottom to top. This helps the molten filament inside the nozzle extrude smoothly.
Tools: heat-resistant gloves, unclogging pin (included in the toolbox).
- On the printer screen, tap Nozzle & Extruder to select the nozzle you want to unclog.
- Set the nozzle temperature slightly above the average and tap Confirm to start heating.
- After the nozzle heats up, insert the unclogging pin and move it up and down several times.
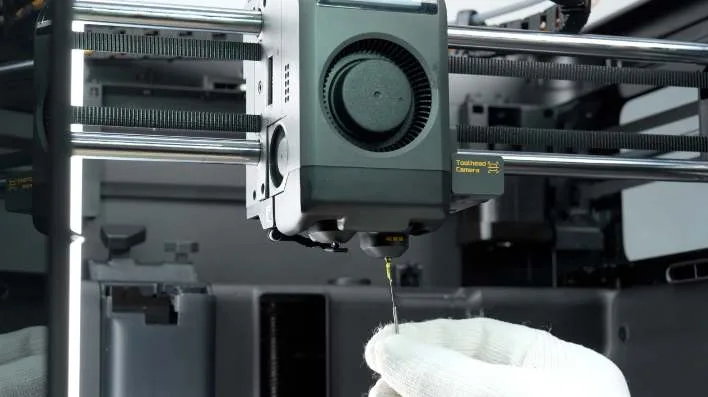
After that, tap Extrude to extrude filament. If the filament does not extrude normally, or if the extruded filament is too thin or breaks easily, see Unclog by Cold Pull for the next step.
10.2.3 Unclog by Cold Pull
Cold Pull is a common nozzle maintenance method. During the process, the nozzle is heated to soften the filament, then the filament is pulled out after it cools and partially solidifies. Repeat the cold pull several times to better remove clogs and residue inside the nozzle.
Due to the different structures of the printer’s dual hotends, the cold pull procedure is slightly different. On the printer touchscreen, go to Toolbox › Nozzle Cold Pull Maintenance, then follow the on-screen instructions.
Tool: Filament of the same type as the residual filament, but in a different color.
Main Hotend Cold Pull
- Select the nozzle and filament.
- Press the outer ring of the filament inlet and remove the PTFE tube connected to the main hotend toolhead filament inlet.
- Insert the filament. The printer will automatically run the cold pull procedure.
- Slowly pull out the filament and check the end for residue to decide whether to repeat the process.
- After the cold pull is complete, reinstall the PTFE tube on the toolhead.
Auxiliary Hotend Cold Pull
- Select the nozzle and filament.
- Press the outer ring of the auxiliary extruder PTFE tube bracket to remove the PTFE tube.
- Insert the filament. The printer will automatically run the cold pull procedure.
- Slowly pull out the filament and check the end for residue to decide whether to repeat the process.
- After the cold pull is complete, reconnect the PTFE tube.
10.2.4 Unclog with Allen Key
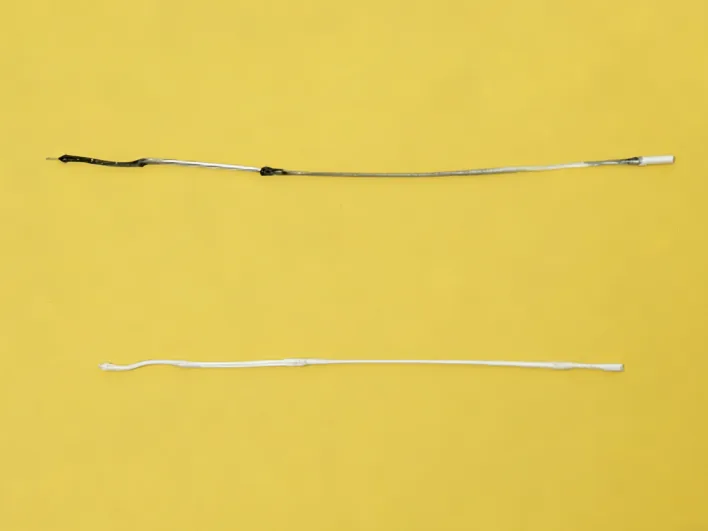
If a swollen filament is stuck inside the hotend and cannot be extruded or pulled out, insert a heated allen key into the filament to soften it and let it wrap around the key, then pull them out together.
Tools: Heat-resistant gloves, H1.5 allen key, pliers, lighter.
- Remove the hotend.
- Hold the allen key with pliers and heat its end for about 10 seconds. Be careful to avoid burns.
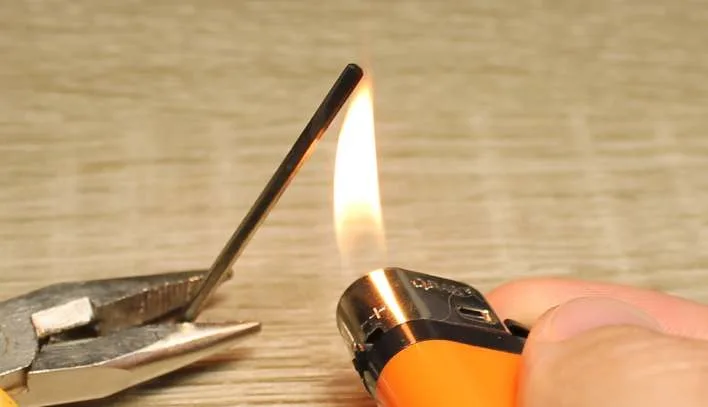
- Quickly insert the allen key into the hotend through the cold zone, as shown below, and leave it for 30 seconds.
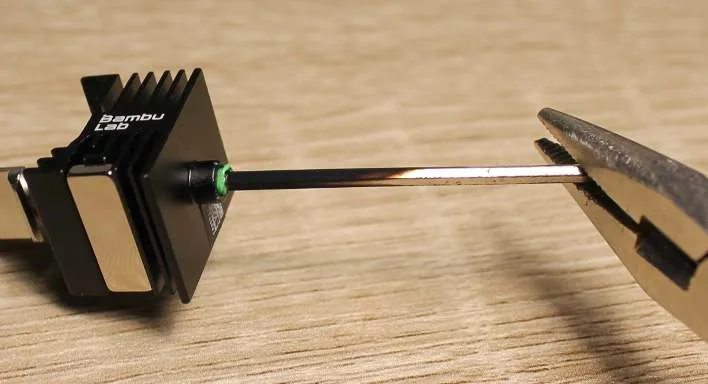
- Heat the nozzle tip with a lighter for about 20 seconds. Slowly pull out the allen key to remove the filament and clog from inside the hotend.
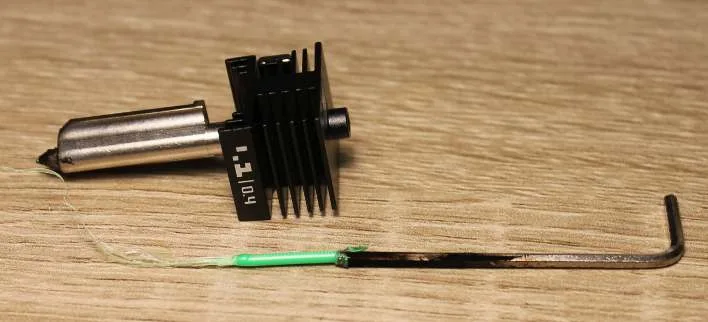
- Once finished, reinstall the hotend.
10.3 Loose Belt
Tool: Allen key H2.0
After long-term use, the printer belt, also known as the timing belt, may wear or loosen, causing print quality issues, such as circles printing as ovals, or HMS error messages. In this case, maintain and tension the belt.
10.3.1 XY Belt Tension
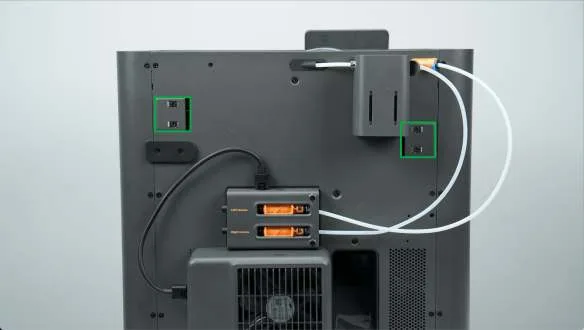
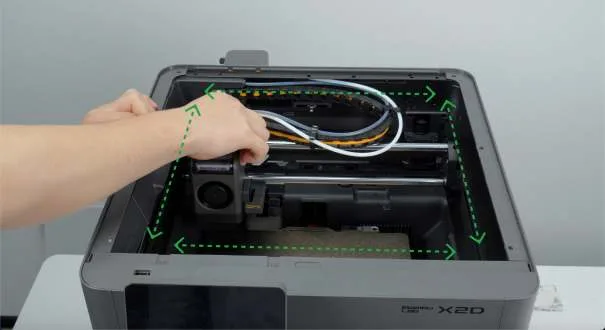
- Loosen the 4 tensioning screws by 1 to 2 turns.
- Move the toolhead clockwise and counterclockwise along the printer frame for 3 to 5 cycles.
- Retighten the 4 screws.
10.3.2 Z Belt Tensioning
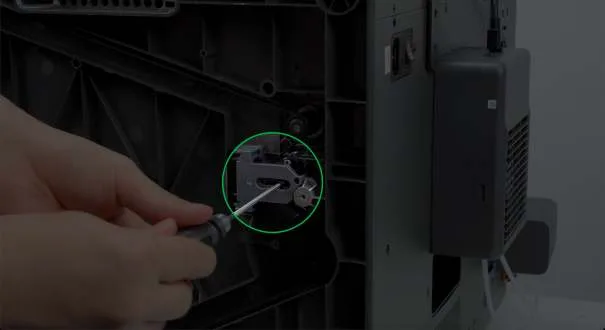
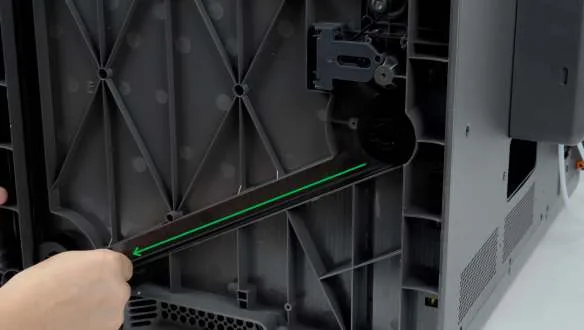
- Remove the printer’s top cover and lay the printer on its side.
- Loosen the tensioning screw by 1 to 2 turns.
- Pull the Z-axis belt through 3 to 5 cycles and make sure it moves smoothly.
- Retighten the screw.
- After these steps, place the printer back on a stable, level surface and reinstall the top cover.