
Printing from Multiple Devices
Source: X2D 3D Printing User Manual · v1.0 · 2026.05 · p. 34–41
4.1 Start a Print from Bambu Handy
Bambu Handy is an all-in-one mobile app designed for Bambu Lab 3D printers. It lets you search for and print models with one tap, remotely monitor and manage print jobs, quickly reuse past projects, and adjust settings during printing.
4.1.1 Install Bambu Handy
Before installing Bambu Handy, please ensure the following:
- The printer and your phone are connected to the network.
- The selected region for the printer matches the region of the Bambu Handy app version.
-
Visit bambulab.com/download or search for Bambu Handy in your mobile app store to download and install the app.
-
Open Bambu Handy, read and agree to the Privacy Policy and User Agreement, then enter the homepage.
-
On the Me page, tap Sign In / Sign Up, enter your email address and verification code to complete registration.
-
On the printer touchscreen, tap the settings icon > Log in, and a QR code will appear.
-
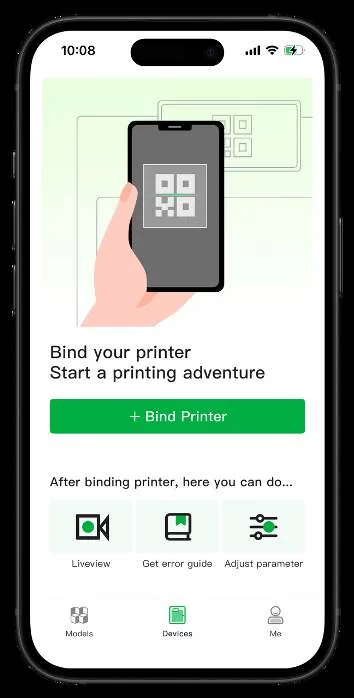
On the Bambu Handy Devices page, tap + Bind Printer (as shown below), then scan the QR code on the printer touchscreen.
-
Review and accept the Terms and Conditions and Privacy Policy, then tap Confirm to Bind.
-
Name the printer, then tap Confirm.
4.1.2 Start Printing in Bambu Handy
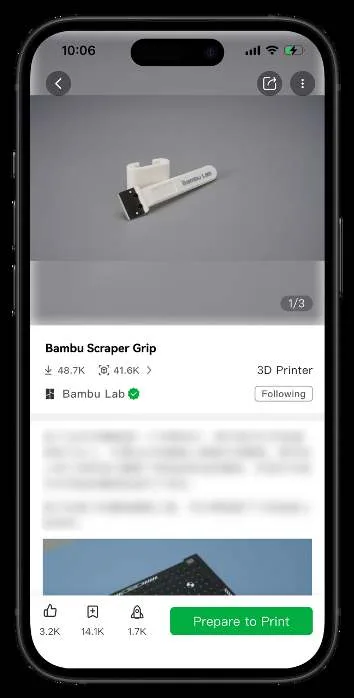
- On the Models page, select the model to print and click Prepare to Print.
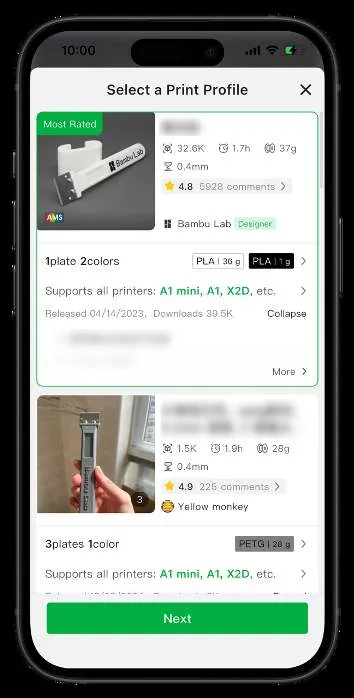
- Select your printer model and print profile, then click Next to enter the Prepare page.
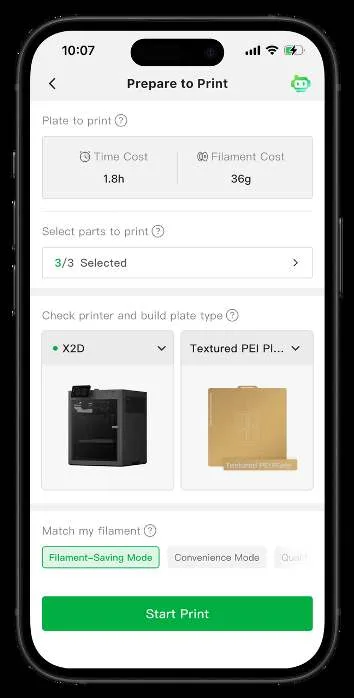
- Check the printer model, build plate type, filament grouping strategy, and select filaments for both hotends. Set the print copies and print options, then click Start Print.
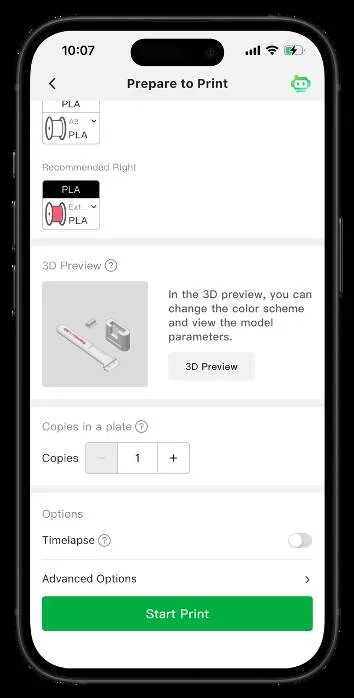
- Monitor the print job or perform other operations (such as adjusting print speed) on the Devices page.
4.1.3 Devices Page Introduction
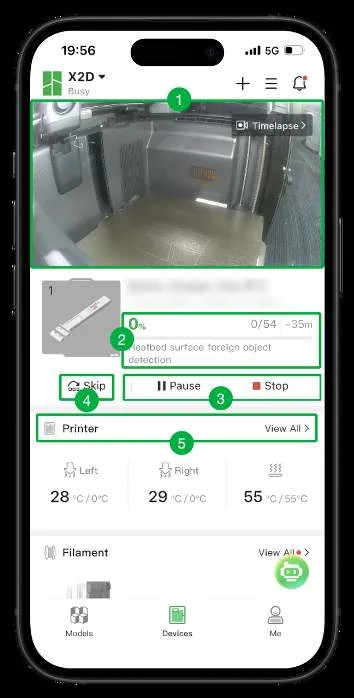
- Camera view: Remotely view the live feed of the printer to monitor print status.
- Progress bar: Displays the current print layer and estimated remaining time to track print progress.
- Task control: Pause or stop the print in real-time.
- Parts skip: Skip the current object and continue printing the remaining objects when one of the objects collapses or fails to print correctly.
- Printer settings: Adjust print speed, heatbed temperature, light, and more (see Common Screen Controls).
4.2 Start a Print from Bambu Studio
Bambu Studio is Bambu Lab’s official slicing software, designed specifically for Bambu Lab 3D printers. It features project-based workflow management, systematically optimized slicing algorithms, and a clean, user-friendly interface.
Before 3D printing, you need to slice the model in software to convert the 3D model into G-code instructions that the printer can recognize. This is a key step in turning your design into a finished print.
4.2.1 Install Bambu Studio
To smoothly install and run Bambu Studio, please ensure your computer meets the following requirements:
- Operating system: Windows 10, Mac OS X 10.15, Ubuntu 20.02, Fedora 36, or later.
- Processor: Intel® Core 2 or AMD Athlon® 64; 2 GHz or higher.
- Memory: Minimum 4 GB RAM; 8 GB RAM or higher recommended.
- Storage: At least 2 GB of available space.
- Graphics support: OpenGL 2.0 compatible.
Installation Steps
- Download Bambu Studio.
- Windows and MacOS versions: bambulab.com/download
- Linux version: github.com/bambulab/BambuStudio/releases
- Double-click the downloaded .exe file and follow the instructions to complete the installation and open the software.
- Select your region and click Next.
- Read and choose whether to join the Customer Experience Improvement Program.
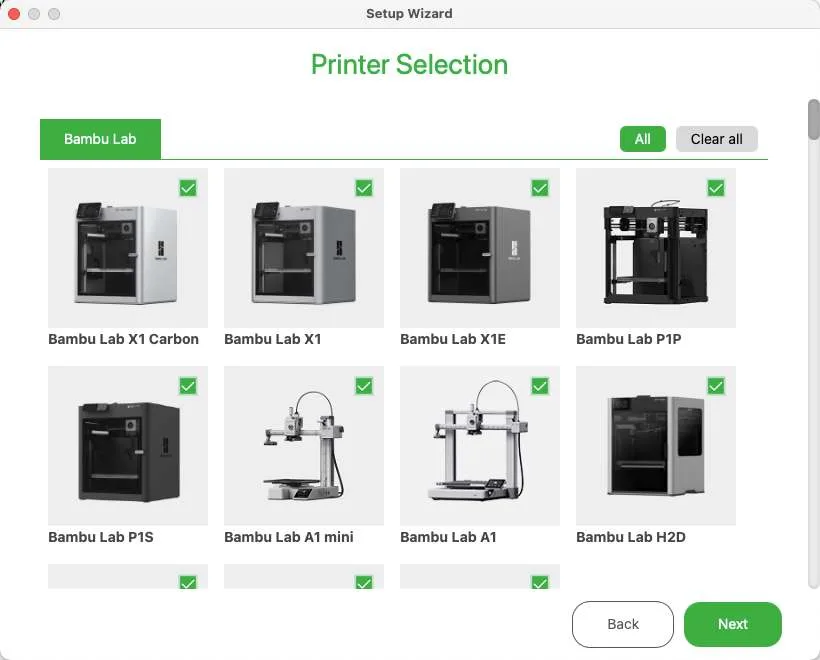
- Select your printer model and nozzle size presets, then click Next. The chosen presets will be used for slicing to generate appropriate print paths.
-
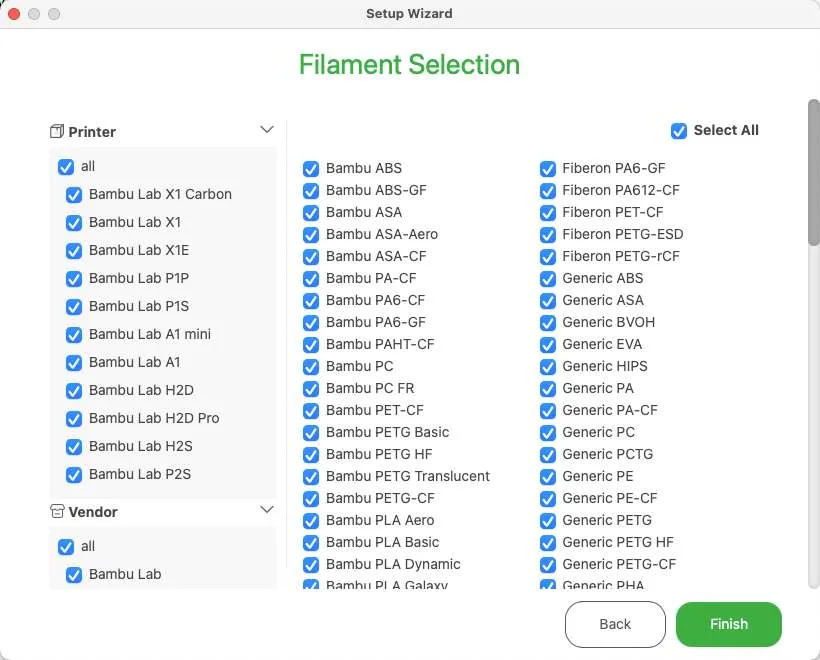
Choose the filament preset, then click Next.
Filament presets include print temperature and other parameters. Once you select a filament, all printing parameters will be applied during slicing without manual adjustments.
-
Check Install Bambu Network Plug-in, then click Finish to start the installation automatically.
This plug-in supports printing via local networks or the internet and provides remote control and user data synchronization features.
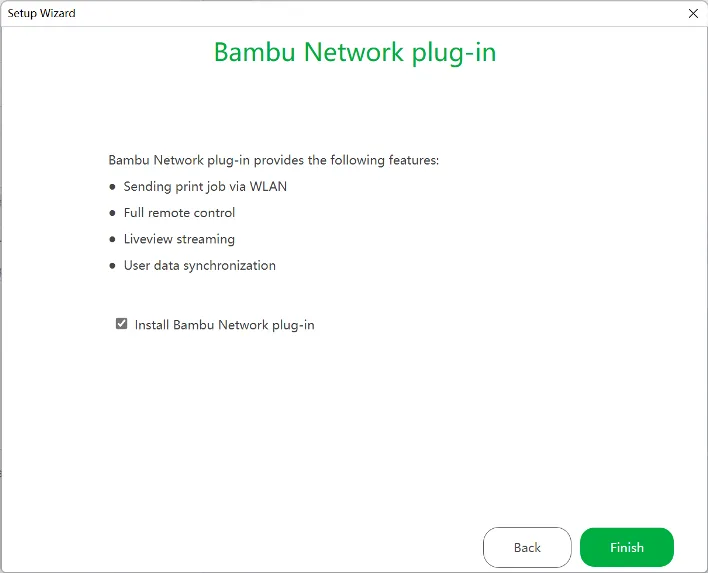
- After logging in, printer information will be automatically synchronized across all your devices.
4.2.2 Download and Import Model
MakerWorld hosts a wide variety of high-quality models uploaded by creators, including model files and complete print profiles. The creators have predefined the print parameters, allowing you to download and send the model to the printer with one click, requiring no complex setup.
MakerWorld Models
- Select the model you want to print on the MakerWorld website or within Bambu Studio’s online models, then go to the model details page.
- Choose a print profile that matches your printer model and printing needs.
- If you use MakerWorld in a browser, click Open in Bambu Studio. If you use Bambu Studio, click Download and open.
- Bambu Studio will automatically download the model and open the Prepare interface.
Other Models
- Import the model using your preferred method.
- In the top left corner, select File > Import > Import File (3MF/STL/STEP/SVG/OBJ/AMF…).
- In the Prepare page, click the import icon in the top toolbar, select the model file, then click Open.
- Drag and drop the model file directly onto the plate in the Prepare page.
- After successful import, the model will automatically load onto the plate, ready for previewing, editing, or slicing.
4.2.3 Start Printing in Bambu Studio
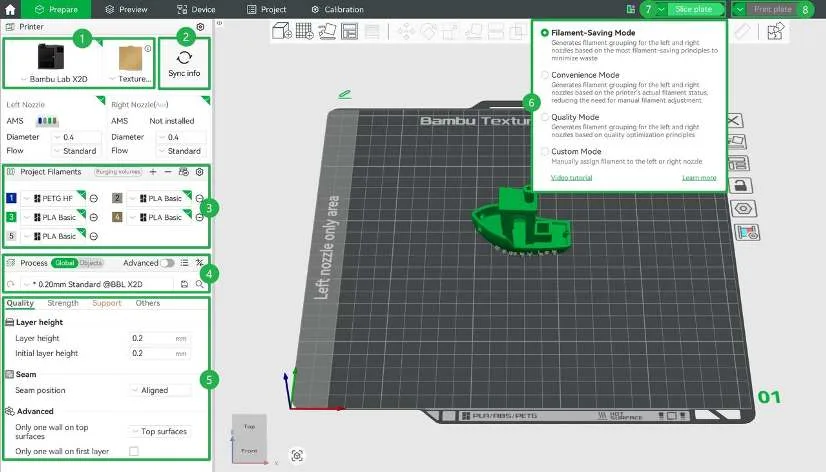
-
Select the correct printer and build plate.
-
Click Sync info to automatically sync the current printer’s nozzle information and AMS quantities.
-
In the Project Filament list, click the sync icon to sync filament information from the AMS device.
-
Click the selection box to choose the ideal process preset. For example, when printing with a 0.4 mm nozzle, a layer height of 0.20 mm is a common choice.
-
Adjust slicing parameters.
-
After completing all settings, select the filament grouping mode. For details, see Select Filament Grouping Mode.
-
Click the Slice button to slice the model and view color schemes, filament usage, print time, and other information.
-
Send the print job. In the pop-up window, select the corresponding filament from AMS or external spool, then click Send.
4.3 Start a Print from Printer Screen
On the printer touchscreen, tap the file icon > Print File > Internal (or USB). Choose the model to print (see Start Printing).